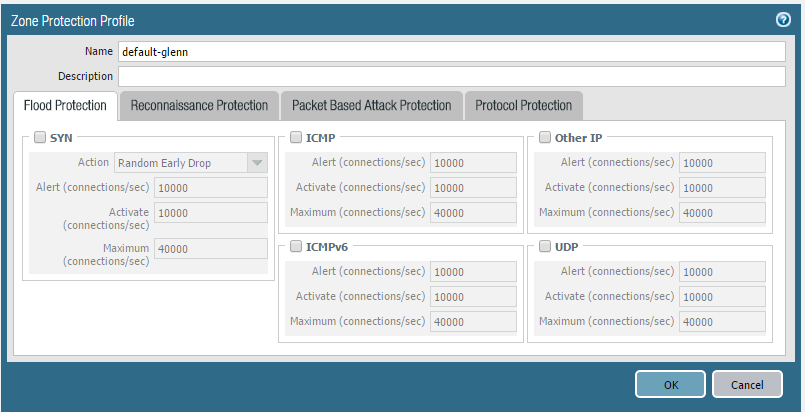
Zone protection is a really important profile to configure on your Palo Alto Networks firewall, since you can stop many network based attacks and reconnaissance of your network.
Many of the settings are just toggle on/off, but the one that give the most value is the Flood Protection tab, and here you need to data from your environment to have any value.
No need to allow 40000 CPS when you never see more than 2000 CPS during peak hours.
But the problem has been that this information is not that easy to obtain without the right tools, but this have now changed with the release of cpsmine.py!
This is a small python script that can give you a good recommendation on what to fill into the Flood protection tab!
Download the script: cpsmine-py
MD5-hash: 0F290DD81231FFB4CE897956810EABD6
As the extension indicates, this is a python script, and thus you need to install python to be able to run it.
Windows: https://docs.python.org/2/faq/windows.html
Linux: You guys probably already have it installed. 🙂
The script work by going trough logs that you have exported from the firewall, so there is no need for a connection to the API or Management interface of the firewall in any way.
Step 1 – Gather Logs!
Considerations:
- Filter down to peak hours, so you don’t skew the data with off-hours CPS.
- Turn on log at session start if possible, so you get the most accurate data.
- Log all traffic, or the recommendation will be off.
- 500mb of log takes about 1 hour to analyze
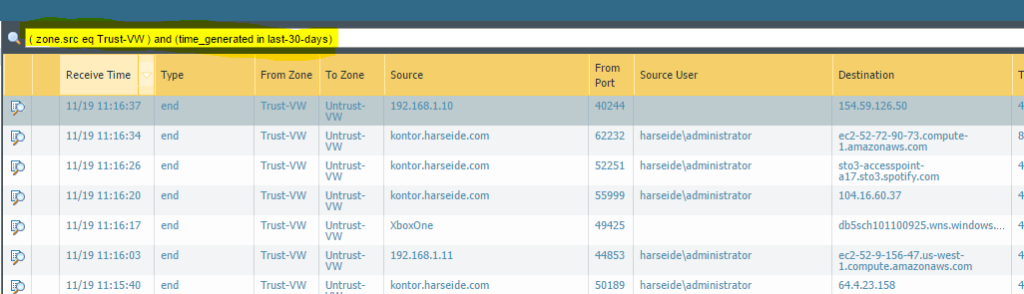
You can export the whole log, and then specify what zone or interface the script should filter on. But to save time, I just filter out the data I need directly on the firwall, so the script don’t have to go trough unnecessary log lines.
My filter is on my internal “Trust-VW” zone, and the reason is that I dont host anything, so there should be no connections originating from my “Untrust-VW” zone.
But if you are hosting something, I suggest starting to analyze CPS on the external zone, since Zone protection will give you the biggest benefit there from outside Flood attacks.
After you are happy with your filter, then export it to CSV:
Download the file to a location where you can reach it with the script.
Step 2 – Running the script!
I installed python on Windows, so I am running the commands directly in CMD.
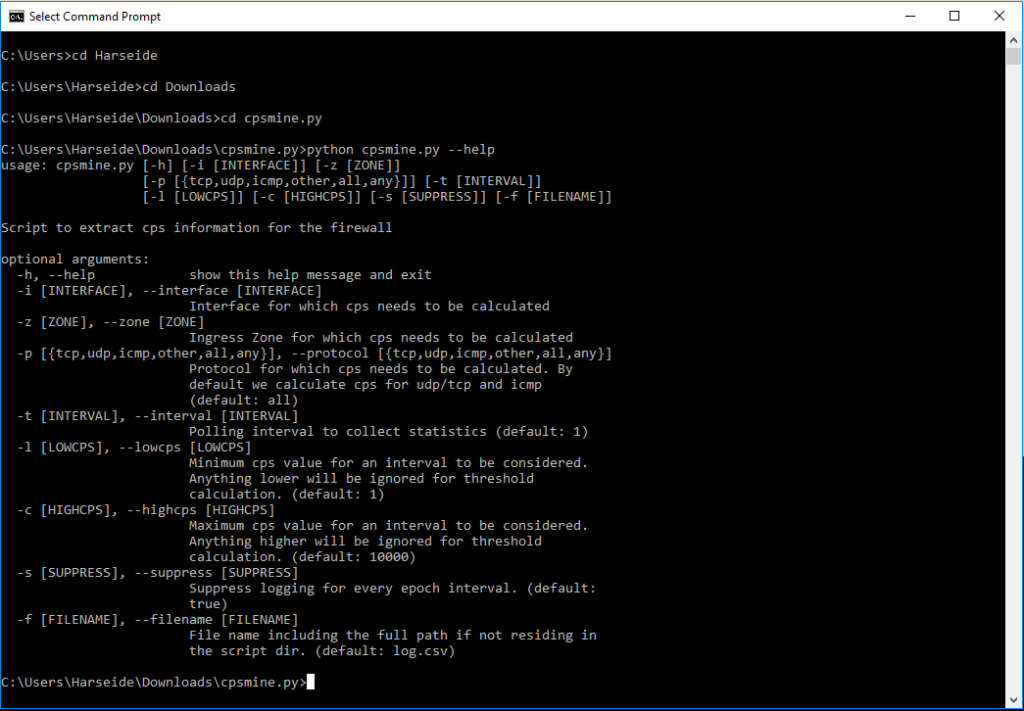
Here you can see the “–help” trigger, and you have several ways to customize the script.
The LOWCPS and HIGHCPS triggers are used to filter out off-peak CPS and abnormal-high CPS so the calculation get the most accurate data that resemble an ordinary day.
The rest is rather self explanatory.
Now let’s run the script!

python cpsmine.py -f log_blog.csv -z Trust-VW -s no
-f = log-file you exported
-z = Zone you want to know CPS
-s = Suppress output or not
Note that “**” indicates that it’s considered in the calculations.
After about 15 min, I get the following output:
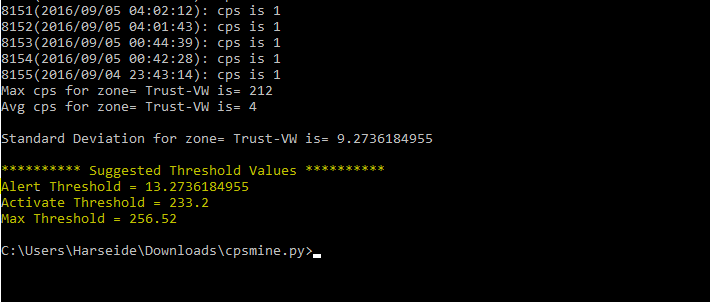
And there you have Alert, Activate and Max recommendations based on the log data, which give you a really nice baseline to work with!
Only thing left to do is to put the data into the Zone protection profile!
Good luck!
Note: You can also run the script on specify protocols as well, if you really want to make a granular Flood protection profile.