One of the new cool features on PanOS 8.0 is the fact that we now can enforce Multi-Factor Authentication on the Network.
Some might think that this is not a big thing but consider the fact that you now can enforce MFA on all internal applications without having to make any changes to the application itself. You can now add an extra layer of security on what matters the most, and stop credential theft, as long as nobody has stolen the phone from the user as well!
So let’s see how we go about testing it!
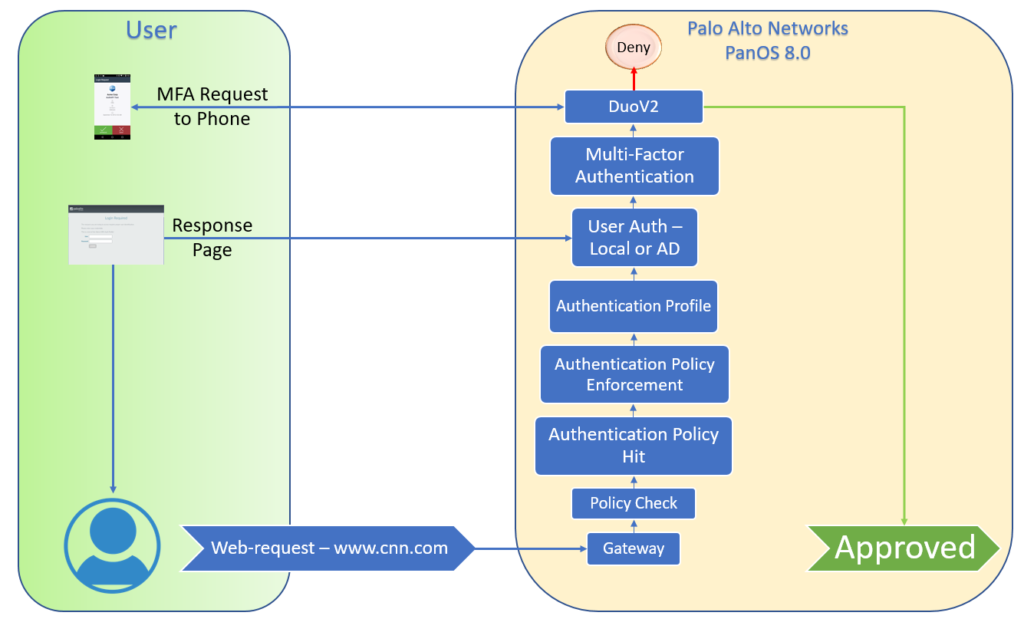
Created a fast workflow for my testing, to visualize how it will work internally on PanOS 8.0. As you can see we are able to intercept the requests coming to the gateway and enforce a Multi-Factor Authentication before we are allowed to connect to the application via the network.
Now let’s start to configure it!
Step 1:
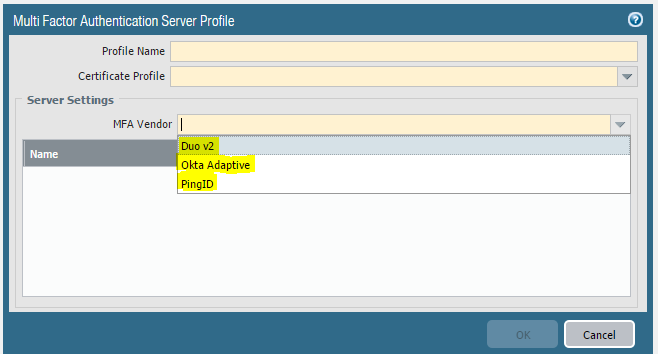
Choose an MFA provider. PanOS 8.0 natively integrate with 3 out of the box:
Duo v2
Okta Adaptive
PingID
PanOS 8.0 can also integrate with other providers via Radius integration as well. But we will use Duo v2 since they are easy to setup and also free for personal use!
Step 2:
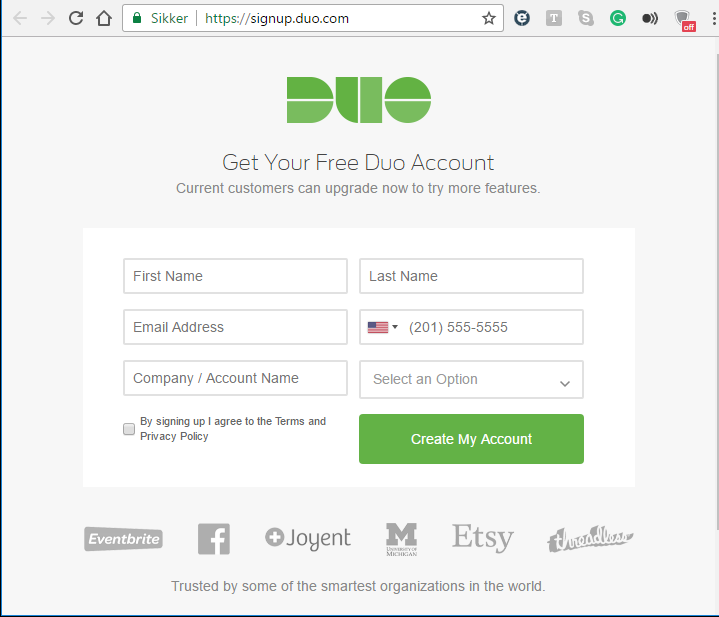
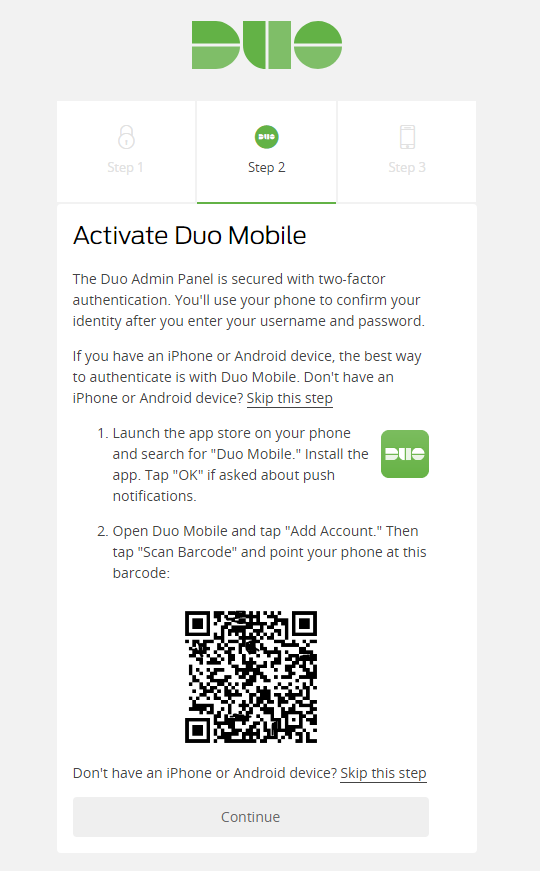
Create an account on Duo, and enroll your admin device.
Just download the Application, and scan the barcode!
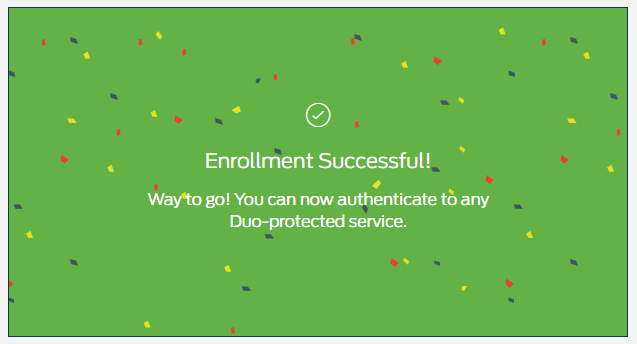
You should get this screen when its done.
Step 3:
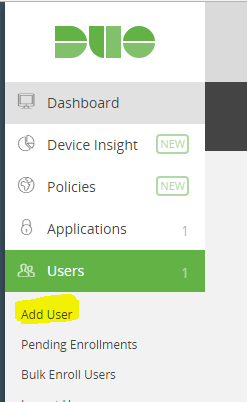
We now need to create users, you can either import from AD or do as I, and just create users that match up with the local users in the local database on the PA device.
I created the user “Glenn”, and installed the Duo application on my android phone and added the users there in the same way as you did with the admin user in step 2.
We are now ready to configure the firewall!
Step 4:
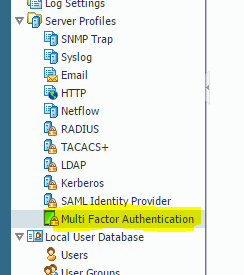
Go to Device-> Multi Factor Authentication-> Add.
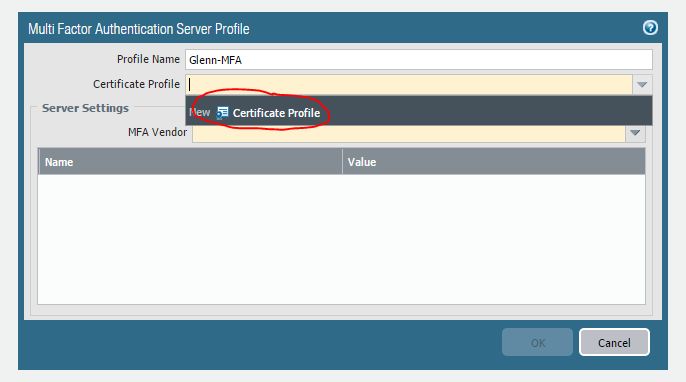
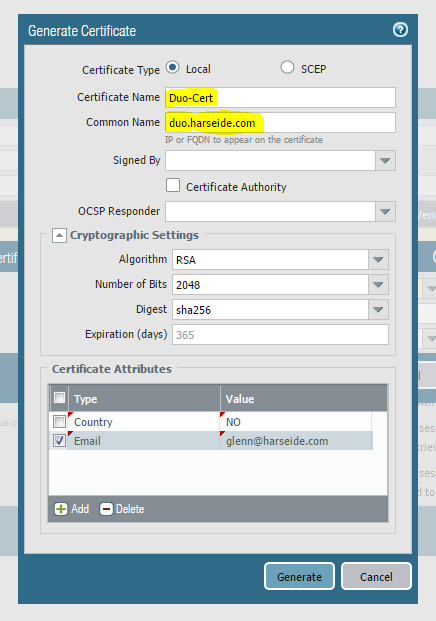
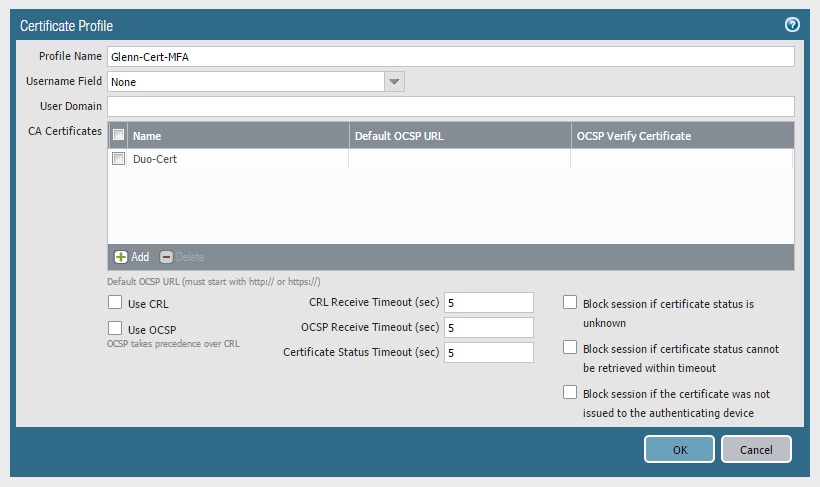
Create a Certificate Profile if you don’t already have one, this is the certificate that the firewall presents to the chosen MFA vendor. If you don’t configure it on the MFA side, then this is mostly a cosmetic step.
Remember to select “Certificate Authority”, since I forgot on this screenshot.. the rest is not that important, as long as you fill something in.
Then you add the new certificate to the Certificate Profile, give it a name and keep all settings default.
Step 5:
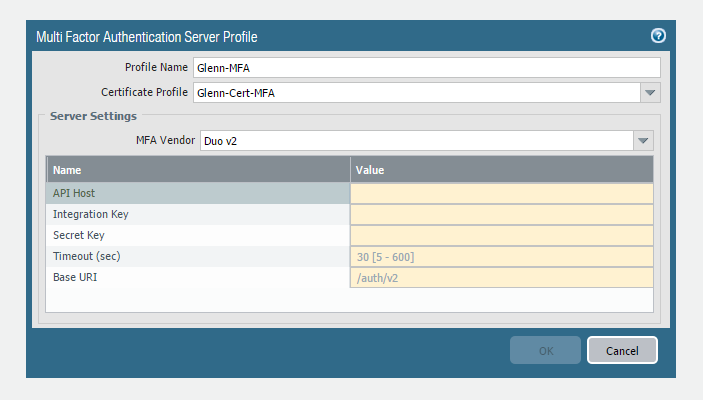
When you have certificate profile, you are ready to fill in the rest to setup the MFA connection to Duo v2.
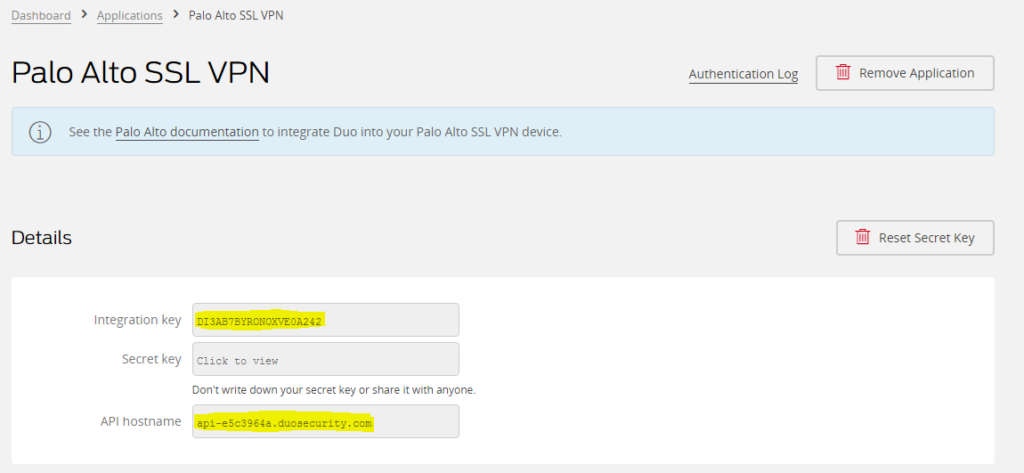
All the information you need is on the Duo page, just go to “Applications” and browse to “Palo Alto SSL VPN”, and just fill it in on the firewall. Leave the Timeout and Base URI as defaults and press OK.
After a commit, you will now have a working connection to Duo v2 for MFA, next is to use it for something.
Step 6:
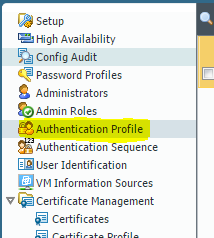
Device -> Authentication Profile -> Add
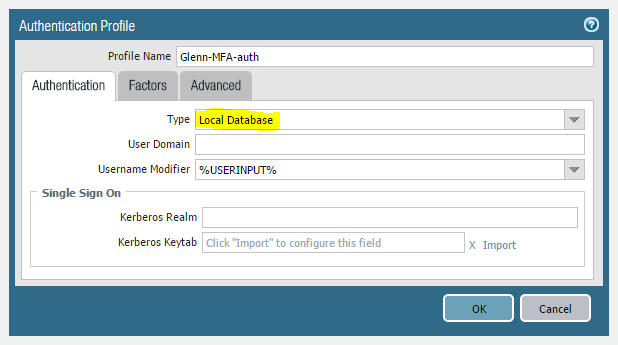
Next is to connect the MFA profile to an Authentication Profile. The Authentication Profile is what decides what is the first authentication factor before we get to the MFA.
I chose “Local Database” since this is a home lab, and I have created my own users directly on the firewall. You could choose AD or other Catalog services we support. This is the first authentication factor.
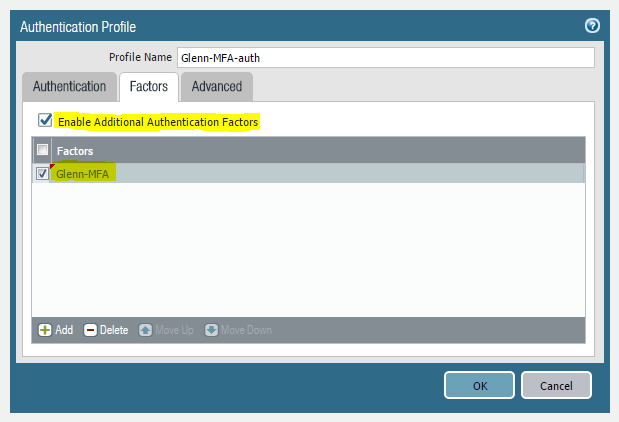
Next is the “Factors” tab, and here you have to enable “Enable Additional Authentication Factors”, and then push “Add” and chose the MFA profile we created earlier.
Press Ok, and we have created an Authentication Profile.
Step 7:
After completing the connection to the MFA vendor, and creating an authentication profile we need to configure the firewall to be able to intercept and present the MFA page to the users.
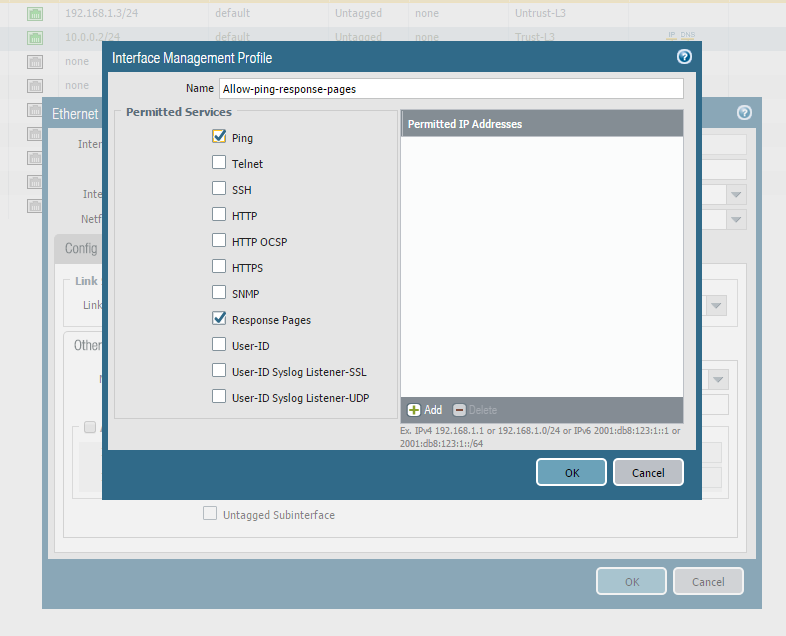
First, we need to figure out what interface on the firewall that will present the page, and then assign an Interface Management profile to that interface that allows Response Pages, so the firewall can intercept and present MFA page.
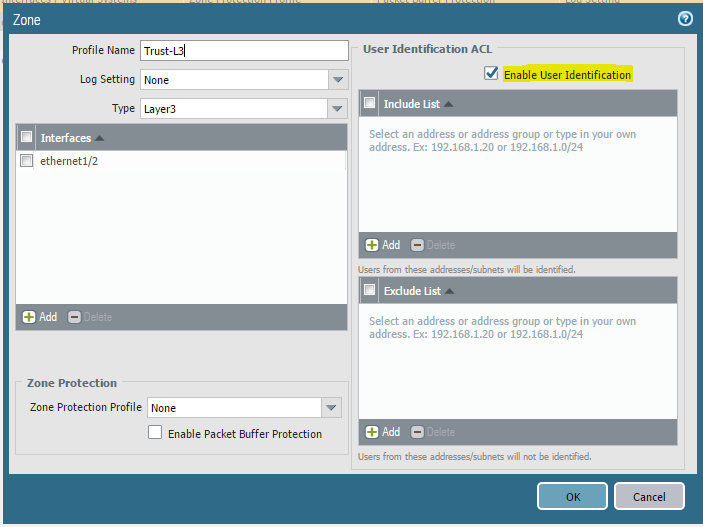
After that, you need to ensure that the Zone that the interface is in has Enabled “User-Identification”, so we are able to process User information.
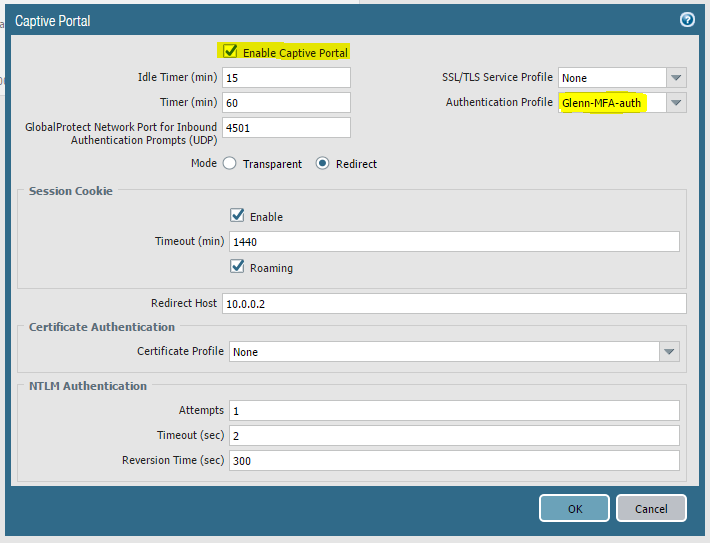
Go to Device -> User Identification -> Captive Portal Settings
The last point of this step is to enable Captive Portal and chose the Authentication Profile we made in Step 6. This ensures that we can present a captive portal page to the user that will forward the credentials to the right Authentication broker.
You can also select if Captive Portal will intercept in Transparent or Redirect mode. To make it short, Transparent is used if the firewall is deployed in Virtual-wire, and Redirect is used if you are in Layer 3 mode.
I just used the IP of the internal interface for Redirect, but you could also use a Loopback interface for example.
Step 8:
We have now done all the preparation on the firewall, and we should now have a working MFA connection and interface ready to intercept with Captive Portal.
Next is to actually use this configuration.
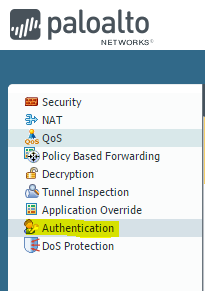
Policy -> Authentication -> Add
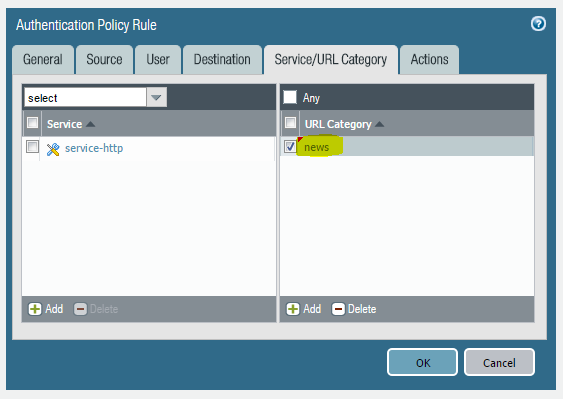
We then get a typical pop-up to create a new policy. For the test, I chose to just use the “news” URL Category as a match criteria.
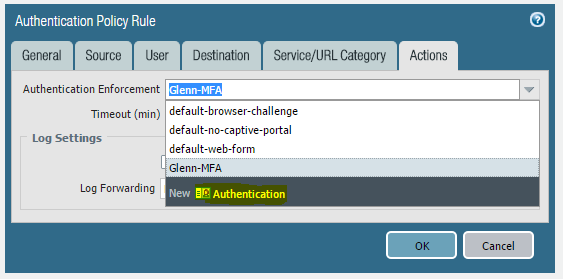
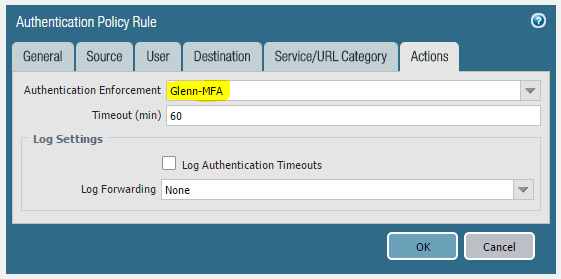
It’s when we get to the action tab that we can see some difference, here we chose “Authentication Enforcement” and “New”.
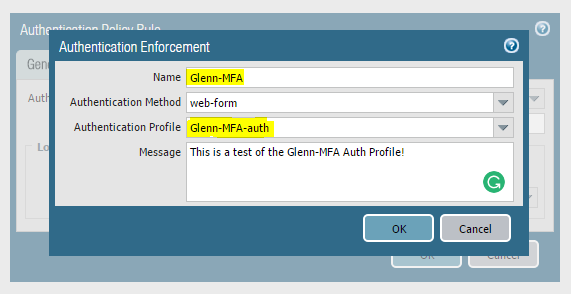
Here we give it a name, chose “web-form” and the authentication profile from earlier to get the captive portal to work. We have other options like browser-challenge as well. But that is for another post.
Now we have a working Authentication policy, just as simple as creating a Security policy.
Step 9:
After a commit, we are ready to test.
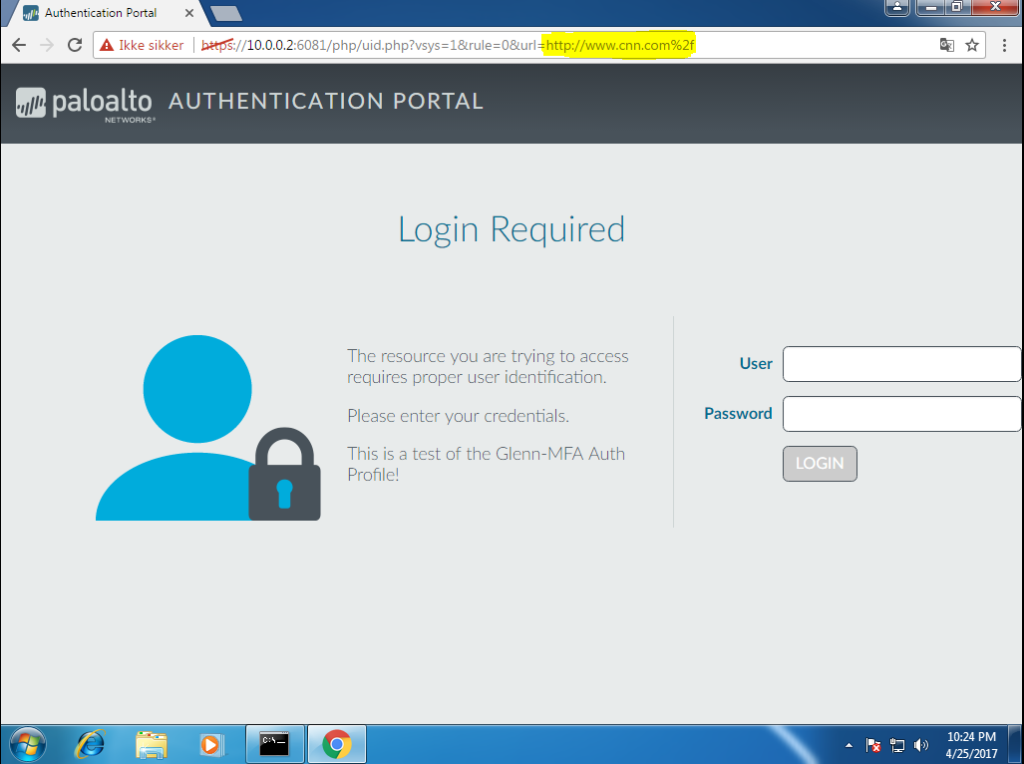
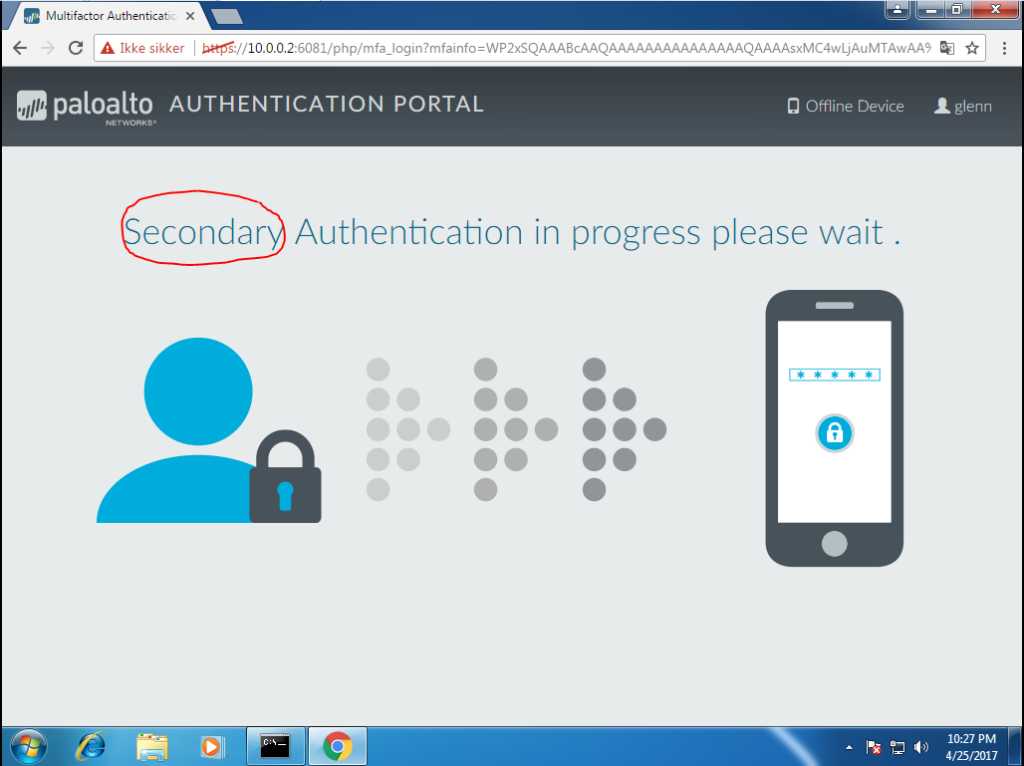
As you can see we tried to go to www.cnn.com but was intercepted by the firewall.
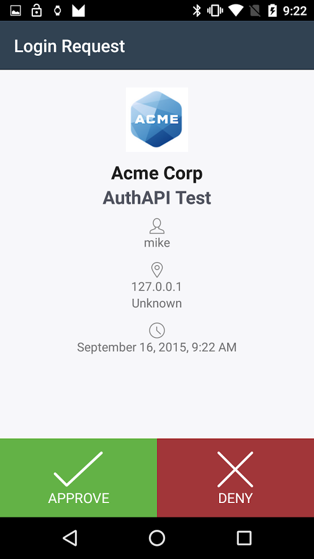
We enter username and password, and the next phase is to approve the Secondary Authentication on the phone.
(This is not from my test.. just for a visual reference).
If you approve, you will be sent to the page you requested.
Conclusion:
Sure, it takes a little effort getting MFA up and running in the beginning.
But when you are done, you will be able to add MFA on any application that has to traverse the firewall. And with integration with other new features in PanOS 8.0, you will be able to automatically move clients, servers or whole zones that might have been infected, to require MFA to move around the network.
This will effectively stop the movement of threats or hackers using stolen legitimate credentials, since they will most likely not have access to your users phone.
You will also be able to add an extra layer of security of the web-app that that one guy made in 2001, and never updated before he left a year later..! Finally!
Good luck!
Really good blogpost. Keep up the good work
Great article Glenn!
Can you expand upon how you would go about using other vendors than the 3 listed?
“PanOS 8.0 can also integrate with other providers via Radius integration as well. But we will use Duo v2 since they are easy to setup and also free for personal use!”
How would you add a RADIUS server as secondary factor, when there are only the three vendors to choose from in the MFA Profile drop-down list?
Hi! Great question, and I am working on a followup post on exactly this matter! Give me a couple of days!
Awesome – much appreciated 🙂
Keep up the good work!